Using the Stack Harbor PaaS intuitive UI, API or CLI, you can quickly take advantage of these benefits with a process designed to be simple and straight forward, while letting PaaS automation take care of the heavy lifting.
This guide shows some of the basic steps required to get started with your first project.
Jump Right In: Deploy Your First Application
When you access the Stack Harbor PaaS dashboard for the first time, a short tutorial (can be manually called via the Help > Tutorial option) will be automatically started. It provides you with a quick platform overview and a step-by-step walkthrough for your first environment creation and application deployment. Follow these tips or skip the tutorial and use the steps described below:
Option A: Application Marketplace
You can access Stack Harbor PaaS Marketplace directly from the dashboard to install various popular solutions in one click. This is the fastest way to get your first application up and running. We recommend you to try the clusters solutions to see the real strengths of our platform, in action.
4. Click the Marketplace button at the top of the dashboard.
![]()
2. Find a prepackaged solution within the list to the left or using the search field at the top.
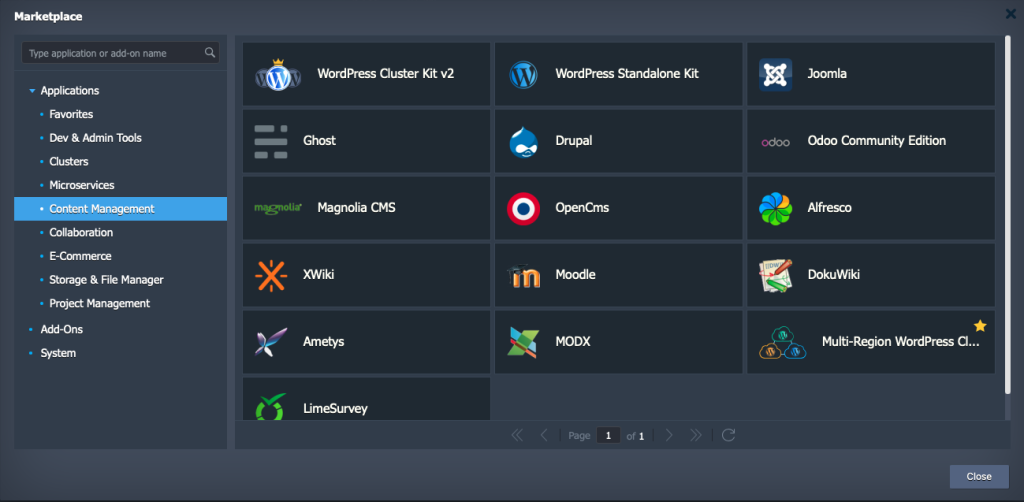
Hover over the marketplace item and click the Install button.
3. Configure installation preferences (e.g. environment name, alias, etc) and click Install one more time.
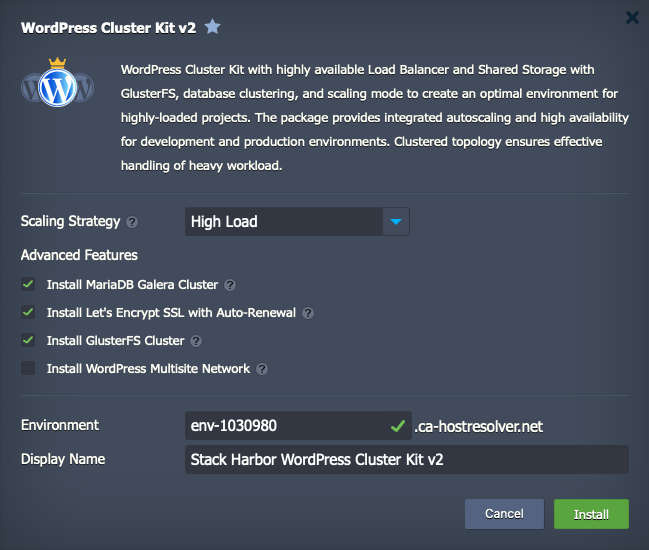
All the further steps will be performed automatically by the platform, i.e. an environment with the required topology creation, the appropriate application deployment, the required dependencies installation, connections (e.g. with a database) and configs setting.
So, in just a few minutes, you’ll have a working solution environment, complete with a custom hostname
Option B: Customized Environment Deployment
To leverage the real benefits of Stack Harbor PaaS automation and orchestration, most users will probably choose to create their own customized environment. By doing so, you have granular control over compute resources, service layers in your stack, clustering automation as well as automated, vertical and horizontal scaling with user defined thresholds and scaling strategy.
1. To get started, lets navigated to your dashboard and click the New Environment button in the upper-left corner of the dashboard.
![]()
2. The Topology Wizard will open, where you can set up your environment. Among the central platform features configurable via this interface, are:
- Software Architecture Support (PHP, Ruby, Python, Node.js, .NET, Go, Java)
- multiple programming languages support (Java, PHP, Ruby, Python, Node.js, .NET, Go) and custom Docker containers integration
- wide list of managed software stacks
- automatic vertical scaling to ensure fair pricing and horizontal scaling to provide flexibility and reliability
- public IP attachment for direct access from the Internet

For now, let’s Create just a single Tomcat application server.
3. In a minute, your environment will appear on the dashboard.

4. Stack Harbor PaaS supports multiple ways of automatic application deployment so that you can select the most suitable option. For this example, we’ll show the deployment of a default Hello World application from the archive in the deployment manager (located at the bottom of the dashboard).

Hover over the project and click the Deploy to button.
5. Within the opened Deploy frame, just select your Environment and proceed with the Deploy button.

6. Wait for the successful deployment pop-up and click Open in Browser to ensure everything works fine.

Herewith, if your application requires some additional settings or don’t have a web interface, do not hesitate to use various in-build configuration tools.
That’s all! Enjoy using Stack Harbor PaaS!